
Employee Safety & Hard Hats
When it comes to personal protective equipment (PPE), hard hats are one of the most essential pieces of safety equipment you will use. Hard hats are more than sun or rain protection—they can save your life. Due to this, it is important to always choose the right hard hat for the task at hand. You should choose the hard hat that will provide the most safety, as well as the best fit, comfort, and design, as this will make it more encouraging to wear throughout the workday.
Hard Hat Safety Standards
OSHA and ANSI standards for hard hats regulate the types and classes of head protection needed for each jobsite. OSHA requires hard hats to be worn any time you are exposed to impacts or penetration, electrical shock, or burn hazards. This may be anywhere objects might fall on your head, you might bump your head on a fixed object, or your head might come in contact with electrical conductors. In other words, you could justify wearing a hard hat for most jobs.
Choosing the Right Hard Hat for the Job
Picking the right hard hat for the job is important for your safety and comfort in the workplace. There are many different factors to consider when selecting a hard hat. Some examples of these factors include:
- Workplace hazards: Consider the type of risks you face in the workplace. For example, if you work around electrical hazards, you will want to wear an insulated hard hat.
- Materials: Hard hats can come in a variety of different materials. You will need to choose a material that fits your safety needs.
- Comfort: Standards require you to wear your hard hat in all areas of the worksite. Due to this, you may be wearing it for a long period of time. In this case, a hard hat with adjustable straps, breathability, and a cozy suspension system is best.
- Size and fit: Hard hats exist in a variety of sizes, so it’s critical to get the correct size for a good fit. A hard hat that is too small or large may not offer you enough protection.
- Style: Hard hats are available in a variety of designs and colors, such as full-brim and cap types or orange and blue. Be sure to pick a style that will keep you safe and corresponds with the roles in your specific workplace.
For the sake of this article, we will not be discussing all of the factors listed above. It is your responsibility to know what hard hat your workplace requires and which will offer you the most protection.
Classes of Hard Hats
Hard hats come in various styles and are put into different classifications. There are three classifications of industrial hard hats: classes G, E, and C. They are rated and made for different levels of protection.
- Class E (Electrical): Hats in this class have an extra insulated lining and can resist voltage up to 20,000 volts.
- Class G (General): The hats in the general category only protect you from a lower voltage, up to 2,200 volts. While these hard hats are insulated, they offer minimal protection to the head. These are the most common hard hats.
- Class C (Conductive): Hard hats in this category offer no electric protection. These hats are normally made out of a conductive material, like aluminum.
Your employer should know beforehand the hard hat best suited for your job. Regardless of which class of hard hat you choose, it should be ANSI-certified and OSHA-aligned. Remember that hard hats don’t replace common sense. There are times when they cannot protect you at all if you are not doing all you can to be safe.
Hard Hat Types
Along with the classifications, it is important to know what type of hard hat you need. Type 1 protects only from impact damage that comes from directly above. Type 2 not only protects from above, but protects the rear, front, and sides. Make sure that, before use, you know the type and classification of your hard hat.
Hard Hat Color Codes & Meaning
On a construction site, there are many tasks and operations that go on at once. In order to avoid chaos and confusion, some method of organization is necessary. Color can be used to distinguish between different areas or duties on the worksite. Color coding is a straightforward yet efficient method of monitoring who is doing what and where they are meant to be. To help prevent accidents and keep operations running smoothly, different areas or tasks can be designated with different colors.
White
A white helmet is generally worn by an individual who has safety responsibilities in the workplace. Some of these individuals could include:
- Site managers
- Foremen
- Engineers
- Supervisors
Sometimes employees will wear white hard hats in hot weather to help keep themselves cool.
Yellow
Workers that wear yellow hard helmets in the construction business are often involved in manual labor duties. This could involve activities like driving a large piece of equipment, digging a trench, or engaging in other strenuous activities.
A yellow hard hat also serves as a safety measure. Not only does it shield your skull from falling objects on the worksite, but for jobsites close to roads and highways, a yellow hard hat makes employees easy to spot.
Blue
Blue hard hats are typically worn by electricians, carpenters, and other technical workers. The hard hat’s color indicates the wearer’s level of experience. The most common color among general laborers is blue.
Green
Green-colored hard hats are frequently worn by safety inspectors or newcomers to a worksite. Green hard hats may also be worn by temporary employees.
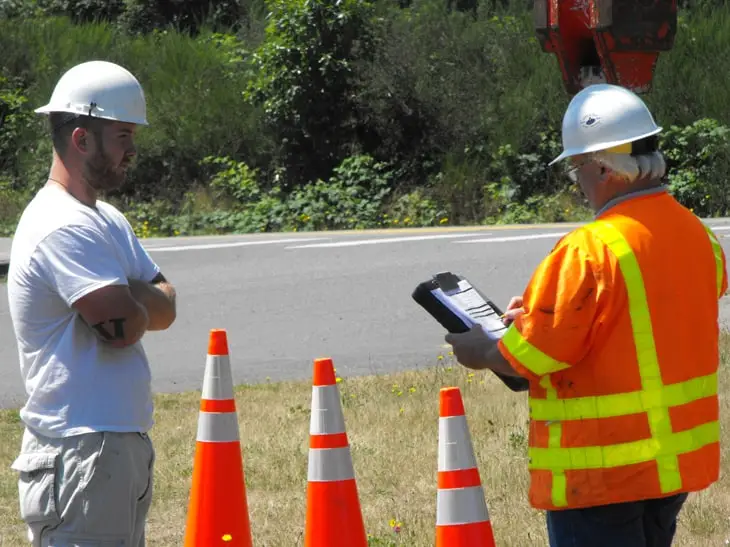
Orange
Spotters, signalmen, and traffic marshals wear orange hard hats so the machine operators can distinguish them from other workers. This is important because operators may not be able to perform their duties safely if they cannot see the other workers.
Because orange is a highly visible color, it helps to ensure that everyone on the jobsite can see the operatives. This is crucial for safety reasons. Some jobs require individuals to stand relatively close to heavy-moving machinery. If operators cannot see these workers, there is a higher chance of injury or fatality.
Red
Fire marshals wear red caps to better distinguish themselves and their responsibilities in an emergency. This bright red hard hat allows other individuals to easily spot and recognize the fire marshals as well. The red indicates to steer clear of the situation, allowing fire marshals to safely handle the fire and ensure that no one gets hurt.
Brown
Brown hard hats are usually worn by welders and other personnel who are exposed to high heat conditions. Brown hard hats provide defense against sparks and other flying debris that may result from welding operations. Brown hard hats are useful for protecting the wearer’s eyes from the welding torch’s intense glare.
Grey
Grey is the color often worn by site visitors, this conveys that they are not familiar with the worksite and, therefore, should not be around operations where they could get hurt.
Styles: Full Brim vs. Cap
There are many different brim styles you can find regarding hard hats. The two most common brim styles are full brim hard hats and hard hat caps.
Pros & Cons of Full Brim Style
The benefits of selecting a full brim style hard hat include:
- Provides protection against the sun’s rays, heat, humidity, rain, and glare
- Shields the face and eyes from flying debris
- Protects against toxic chemicals, weather factors, electrical shocks, and collision impact
The disadvantages of wearing a full brim style hard hat could include:
- Normally made from a heavy material
- Limited life span, must be replaced every 5 years
- Long-term exposure to sunshine, chemicals, and high temperatures causes it to degrade
Pros & Cons of Cap Style
Some of the benefits of using a cap style hard hat are that they protect employees from common hazards while working. Some of the hazards include:
- Cuts
- Bruises
- Scrapes
- Bumps
Hard caps also have a better shock absorption rate than some other styles and, therefore, can protect against heavier blows to the head.
One of the disadvantages of this style is that it provides minimal protection to the neck and ears.
Check the Fit
Once you have chosen the hard hat that meets the needs of your workplace, you need to be sure that it fits properly, is comfortable, and does not irritate your skin. A well-fitting hard hat does not blind, slip, or fall off. Be sure that there is proper space between the shell and the suspension straps (the straps that tighten around your head.) This is to provide ventilation and impact distribution.
Hard Hat Inspection
For a hard hat to do what it is supposed to do, it must be in good working order. It is important to keep your hard hat clean and inspect it daily before use. A hard hat is only as strong as its weakest point.
Inspecting the Exterior
Hard hats are like any other equipment in that they need regular inspection and maintenance. Each day before you put it on, do a quick check for visible signs of weakness. Even dropping your hard hat on concrete can start small fractures in the plastic which can expand and drastically weaken the shell. Examine your hard hat for:
- Holes
- Dents
- Chips
- Cracks
Check the color and shine of your hard hat as well. Prolonged use in the sun can weaken the plastic. Fading color on your hard hat indicates sun or chemical damage. If the colored layer appears chalky or flaking, this means the safety of the shell could be compromised. Replace your hard hat if it appears weakened in any way.
In order to prolong the life of your head protection, never paint, drill holes, or apply labels to your hard hat. Doing this can cover up damage that might have occurred and diminish the lifespan of your hard hat. If your hard hat is perforated, cracked, deformed, lost its not glossy, or suffered an impact, remove it from service. On top of that, manufacturers recommend replacing your hard hat every two to five years.
Interior Hard Hat Inspection
The suspension inside the shell is key to the hard hat’s function. The space in between the webbing and the shell acts as a cushion. Check the headband and webbing for the following:
- Fraying
- Cuts
- Tears
- Excessive dirt
Even though dirt may not seem like a hazard, the particles can get worked into the band and weaken the fibers. If your hard hat gets excessively dirty, wash it in hot water with mild soap. Harsh chemical solvents can decrease the shell’s integrity. Replace the suspension every 12 months, even if it appears fine.
Hard Hat Accessories
In order to improve fit and increase protection from extra risks, workers are able to add extra accessories to their hard hats. For instance, you can use chin straps to keep the hat from blowing off while working in strong winds. Sun shields block out dangerous UV radiation. Hard hat headlamp accessories are necessary as winter approaches. You can use hard hat liners to keep workers cool in the summer and warm in the winter.
To Conclude
Wearing a hard hat is the simplest way to keep yourself safe. Always wear the appropriate hat for the jobsite and inspect it before wearing it.